Kitfox Aircraft Stick and Rudder Stein Air Grove Aircraft TCW Technologies Dynon Avionics AeroLED MGL Avionics Leading Edge Airfoils Desser EarthX Batteries Garmin G3X Touch
Page 5 of 15 FirstFirst 123456789 ... LastLast
Results 41 to 50 of 147

Thread: #Northernfox Build

  1. #41
    Senior Member
    Join Date
    Dec 2017
    Location
    Canada
    Posts
    308

    Default Re: #Northernfox Build

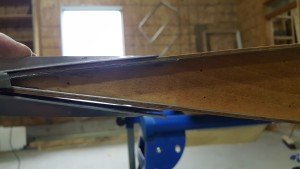
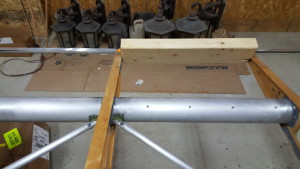
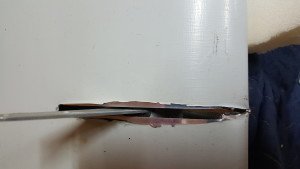
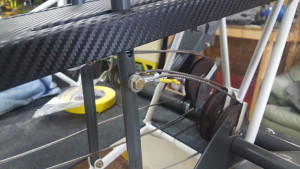
    The site gauges are just the tubing that was in this 18 year old kit. Still looked to be in fine condition. Made a bending block as per instructions and used a hair dryer to soften it up enough to bend.

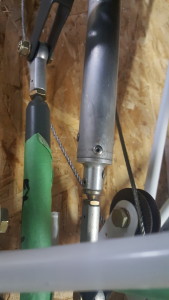
    For the caps... i guess I can try a little brute force.

  2. #42
    Senior Member Esser's Avatar
    Join Date
    Jul 2011
    Location
    Edmonton, AB
    Posts
    2,048

    Default Re: #Northernfox Build

    Just looking at the one picture, it looks like you could take that fuel cap off and turn it 180deg, put it back on and then bend it. They are supposed to point forward.
    ------------------
    Josh Esser
    Flying SS7
    Rotax 914iS
    AirMaster Prop

    Edmonton, AB, CWL3

  3. #43
    Senior Member
    Join Date
    Dec 2017
    Location
    Canada
    Posts
    308

    Default Re: #Northernfox Build

    yeah, bad pic, i think it's just resting on there, not actually turned fully tight. It's off by about 1/2" when on tight.

  4. #44
    Senior Member jrevens's Avatar
    Join Date
    Aug 2009
    Location
    Arvada, CO
    Posts
    2,155

    Default Re: #Northernfox Build

    Yeah, that's common, if not the norm it seems. There are lots of references to this on the forum. They bend easily into alignment... do it slowly and carefully and you will find it works fine - no obvious twisting or other distortion will be evident.
    John Evens
    Arvada, CO
    Kitfox SS7 N27JE
    EAA Lifetime
    Chap. 43 honorary Lifetime

  5. #45
    Administrator DesertFox4's Avatar
    Join Date
    Aug 2008
    Location
    Arizona
    Posts
    3,565

    Exclamation Re: #Northernfox Build

    Talk to us about the fuel sight gauges please. What did you use? I would love to replace the soft tubing.]
    Keep your “soft tubing” Eddie.
    The photo below, I beleive, shows an old version of the fuel site gauges. If my old memory serves me, the tubing supplied with that version was know to turn brittle with age. Might have been certain fuels that it did not work well with but not sure what actually turned them brittle. I and others heard of reports of breakage during flight and spilling fuel into the cockpit.

    I’d advise tracstar to check with Kitfox Aircraft to confirm this is the case before first flight. The 18 year old kit mentioned could be old enough to have those site gauge kits supplied. The plastic fittings are another tell tale that this may be one of those kits. Tracstar please call Kitfox Aircraft to confirm for my peace of mind so I won’t about you and by the way, keep up the good work.


    DesertFox4
    Admin.
    7 Super Sport
    912 ULS Tri-gear


  6. #46
    Senior Member
    Join Date
    Jun 2008
    Location
    wales,ny
    Posts
    711

    Default Re: #Northernfox Build

    Steve, your memory indeed serves you correct, My series 5 is around the vintage of this kit and the sight gauge tubing will eventually fail and cause a real mess, so tygon or whatever the factory uses now is the way to go. I actually saw this happen to a friends newly finished Kitfox at OSH back in the 90's.Bruce N199CL

  7. #47
    Senior Member
    Join Date
    Dec 2017
    Location
    Canada
    Posts
    308

    Default Re: #Northernfox Build

    Quote Originally Posted by DesertFox4 View Post
    I’d advise tracstar to check with Kitfox Aircraft to confirm this is the case before first flight. The 18 year old kit mentioned could be old enough to have those site gauge kits supplied. The plastic fittings are another tell tale that this may be one of those kits. Tracstar please call Kitfox Aircraft to confirm for my peace of mind so I won’t about you and by the way, keep up the good work.
    Thanks... I didn't know there was such instances... so I'll look to replace them just out of the thought of gas pouring into the cockpit.

  8. #48
    Senior Member efwd's Avatar
    Join Date
    Jun 2015
    Location
    Yorba Linda, CA
    Posts
    2,824

    Default Re: #Northernfox Build

    Wow, that certainly doesn't sound like a good situation. Thanks Steve.
    Eddie Forward
    Flying
    SS7, 912iS, Garmin G3X

  9. #49
    Administrator DesertFox4's Avatar
    Join Date
    Aug 2008
    Location
    Arizona
    Posts
    3,565

    Default Re: #Northernfox Build

    Thanks for the confirmation Bruce.
    Glad I wasn’t “miss remembering”, as some of our politicians like to say.


    DesertFox4
    Admin.
    7 Super Sport
    912 ULS Tri-gear


  10. #50
    Senior Member
    Join Date
    Dec 2017
    Location
    Canada
    Posts
    308

    Default Re: #Northernfox Build

    It's been a busy two weeks. Lots of things have happened. I had a few setbacks to overcome and a few more to deal with.
    But it's been forward progress and getting closer to that pre-cover inspection.

    Fabric Covering
    First, speaking of covering, decisions have been made and product purchased. For me it really wasn't a decision of which
    fabric to use, but more about which colors. Oratex was the choice. For me it's the simplicity as well as the unique
    factor.

    There were still a lot of decisions to make though besides color. I'll reveil the color scheme when it arrives, sorry.
    There are limited colors, but they each come in 2 levels of quality and both with or without a special backing to
    reduce the translucency of the material. All at varying costs (also based on color choice). In the end I went with first
    grade backed material. The most expensive choice, but I couldn't stand to see blemishes since this is the finished
    product.

    Additionally, there was a lot of discussion with their techs and support about rib lacing or not. With standard fabric
    it's very strongly suggested in the build manual - but not a requirement. That said, I don't think anyone would go
    without it. However, with Oratex, there is another option to talk about. The adhesive designed to hold the fabric is
    far stronger than that used for standard fabric. The tech specs and tests show that if applied correctly you'd rip
    fabric or destroy structure before the glue lets go.

    That brings up the notion of gluing directly to the ribs instead of rib lacing. Given they are 1" wide I was
    advised that they would provide more than enough bonding surface to glue rather than rib lace. I was also provided with
    several other finished examples (RV7) that didn't rib stitch.

    I've not decided for sure yet, and can easily add the stitching at any point.

    Hopefully the shipment will arrive before christmas.

    New Parts Arrived
    Moving right along I was excited to get my first piece of the avionics - the pitot tube. I'm holding off on most of it
    until the new year and closer to needing it - but I needed the pitot to be ready for pre-cover inspection.


    I decided on the Garmin GAP 26 regulated pitot. It's the most costly option, but with my mission goals of being able
    to night certify and fly over the top (of cloud) it was an easy decision. With it I got the Dynon pitot/AOA tubing kit
    and a Gretz mounting bracket.

    Flapperon Brackets & Fitting
    Continuing from where we last left off with the tank install and trailing edge, things took a slide for the worse before
    it got better.

    The next step was working on the flapperon mounting brackets. First thing I'll say is that if you're working on anything
    but a model 7, upgrade to the model 7 brackets. What a pain in the ass these were. Far more to go wrong, and totally
    obvious why they were changed on the 7. I only know this because a friend just completed a 7 and was helping.


    Anyway, the approach here was to take the 4 pieces of the bracket setup, insert the bolts with the end flapperon hinge
    in order to get best spacing and alighment possible along with the necessary triangular template. Oh man that sucked.
    The results were ok, but probably could have been made easier - somehow.

    After getting those together it was time to line them up on the trailing edge. Well, that's where it started going
    south on us. There was no way that the brackets were going to sit flush on the top and bottom with correct angles - the
    trailing edge that was just finished was causing poor placement.


    Now my first reaction was ****... now what, we're screwed. Luckly my buddy stepped in and just said not much we can do but
    fix it. So, out came the multi-tool with a modified blade. We used it to cut through the hysol attachments on the
    rib ends. Then, after some cleaning and sanding down to make the first perfect (while testing with the hinges)
    that was fixed up. I make it sound easier than it was as it did take a few hours. In the end they all fit perfect.


    _However_ this lead to one more small problem. The measurements for bracket placement had one off by about 1/32 of an inch
    more than acceptable. Again, experience prevailed with the solution. A bottle of water, hairdryer and 2x4. With this
    we wet down the end of the rib, heated it up and used the 2x4 as a brace to ever so slightly adjust for a better
    fit. All I can say is wow. I really wouldn't have known what to do.


    The next unresolved error are the flapperons. I just unwrapped them fully - which wasn't done at time of purchase. Now
    I find the aluminum top and bottom of the bracket slots are tore right through. Again, deflating. I'll have to
    fabricate a small plate to attach over top. But that'll be a story for another day.


    Well, a few days and a few issues solved and fixed. Slow progress but still progress.

    Tanks
    Put on the modified ribs and false ribs and set them to the same contour as others with some wood and hysol. Also added
    the small support pieces against the tank and the number one rib.


    Additionally I orders up some new flexable fuel line to replace the hard molded tube used. I was told there have been a
    few cases of it breaking - and I don't want that mid flight!

    Laker Leading Edge
    So smooooooooooth. Got the LLE fitted and ready to be hysoled, but that will have to wait a bit longer as I still have
    to mount the jury struts. Also made the little fittings for around the main attachments for the fabric to attach to.


    Fuselage
    Moving right along there are some things to tackle on the fuselage. Started with re-mounting the pedals with some new
    hardware. First though they were greased up with some lithium grease.

    Continued with fitting the rudder cables and swaged the ends to the rudder adjustment handles. I had to order the tube
    that fits into the alignment brackets and cut and fit that as well.


    Put back in the wire going to the trim motor as well as ran the static line to the tail where I'll eventually add the
    static ports.

    Oh yeah, also inserted the elevator tube and re-rivited the end back on and attached it.


    Next Up
    Well, that was a big update - and I probably missed something. But next up will be the j-stringers along the sides and
    bottom.

    Also, make sure to check out my website to follow the build. More pictures will be posted there (eventually). NorthernFox Build
    912 IS
    Airmaster Prop
    Garmin Stack
    C-FKLO

Posting Permissions

  • You may not post new threads
  • You may not post replies
  • You may not post attachments
  • You may not edit your posts
  •