Looking good; so clean before the tapes go on.
If I were doing the covering again (perish the thought), I would do the upper surface/tail transition as you have done.


Looking good; so clean before the tapes go on.
If I were doing the covering again (perish the thought), I would do the upper surface/tail transition as you have done.
- Gary
S7 SuperSport Tri-gear
w/Rotax 912, Oratex, Dynon

Thanks! Yeah I got excited that the fuselage is done. Well I guess I still have the upper portion of the vertical stab.I am only taping the fabric joints. If its touching the fuselage I glued it and I am not taping it. So taping is done on the bottom.
I will tape the razor back and vertical stab when I finish the upper portion. I am waiting to get the landing gear back from powdercoating, then I will put it on its gear. Then I will cover and tape the upper portion of the vertical stab and down the razor back. Also waiting on TK1 for the tail spring. They are saying next week they should have pictures out.
Put in many hours but feels like there is not much to show. I was able to get the flaperon tips fences cut, sanded and filled with hysol. There was some imperfections in the clear coat so I filled with some resin, wet sanded and polished. My plan now is to fill the flaperons ends with balsa, sand flat so there is a flat surface to attach to, and then attach the carbon tips. I wanted to practice on a small scale before doing the wing tips. I was able to find some die that I had from building a surf board years ago. I used that to die the hysol, and then fill the ends of the carbon. You have to carve out the foam between the laminated carbon sheets. Taping off saved a lot of time getting hysol everywhere. I am also filling small imperfections then I will wet sand and attached to the wing tips. I was able to get the wing tips covered with oratex and they are ready for the wingtips to be installed. Photobucket is now saying I have used up the free space. With Google photos I figured out how to embed the photos but they are way to big. I will see if I can somehow resize and embedded them. Anyone know how to resize embedded photos?
Last edited by Shadowrider; 01-05-2019 at 10:08 PM.
Ha! Figured it out. The number in the last of the html code is the size.
I taped off the wingtips to keep my from getting black hysol all over them.
I am now filling the small imperfections, then I will wet sand and polish should be ready to glue on!

Last edited by Shadowrider; 01-05-2019 at 10:25 PM.
Progress!
I am back on the road working now so I have some time to do a writeup! Love the cold and so do turbines. Old gal was climbing like crazy.
We received parts back from the local powder coating shop. We went through every silver. We did our best on matching the silver oratex, which is hard to do. We powdered coated landing gear, jury struts, horizontal supports and tail access covers. They where black. We got close but I am afraid the tail access is going to be not close enough for our liking.
I was able to get my wingtips finished up and the Nav lights installed. My brothers are coming shortly. Also finished up the flaperons ends to match.
I ended up wet sanding both sides starting with 1500 and ended with 3000. Really happy how they turned out! Thanks Brandon from Kitfox for getting us these!

It was a little nervous about gluing them back on after all that sanding and polishing. I wanted to make sure we had enough epoxy, but not to much to make a huge mess. Ended up taping them off so the excess could be wiped off easily. Didnt want to do to much but for sure wanted enough!
Finished wiring the connectors and both wingtips are ready to install. I can now say one planes wings are complete and ready to go. Feels like the first thing I have actually finished. Second planes wingtips should go faster now that we have figured out how to finish. Ended up using hysol dyed black to fill in the foam. Then sanded smooth. Ended up turning out sweet! The dyed hysol makes them look like solid carbon, but they are still lightweight. (foam core)
We are trying to figure out next step. I think we will cover main gear and install the gear and set it on its gear. Still waiting for TK1 to hopefully release there tail spring to see if its better than the T3. Then we will jump back to covering the tail.
Also we decided on tail numbers! We really wanted something easy to say and with the fewest syllables. We also wanted it to be easy to jump from one plane to the next, since we will be flying both often. We went with Tango FOX for Turbo Kitfox.
N33TF
N53TF

Really nice work. That Oratex is some nice stuff.
Matching colors is a difficult task, especially if you want perfection. Finding the right hue of silver will be a challenge but not impossible.
Love the way the wing tips turned out! I might have to do something similar.
"Somebody said that carrier pilots were the best in the world, and they must be or there wouldn't be any of them left alive." Ernie Pyle
Brett Butler
Flying: N46KF, 1998 Model 5 Outback, 912ul 110hp, G3x with 2 axis a/p, Beringer wheels & brakes, SS7 firewall forward, NR prop, Custom paint
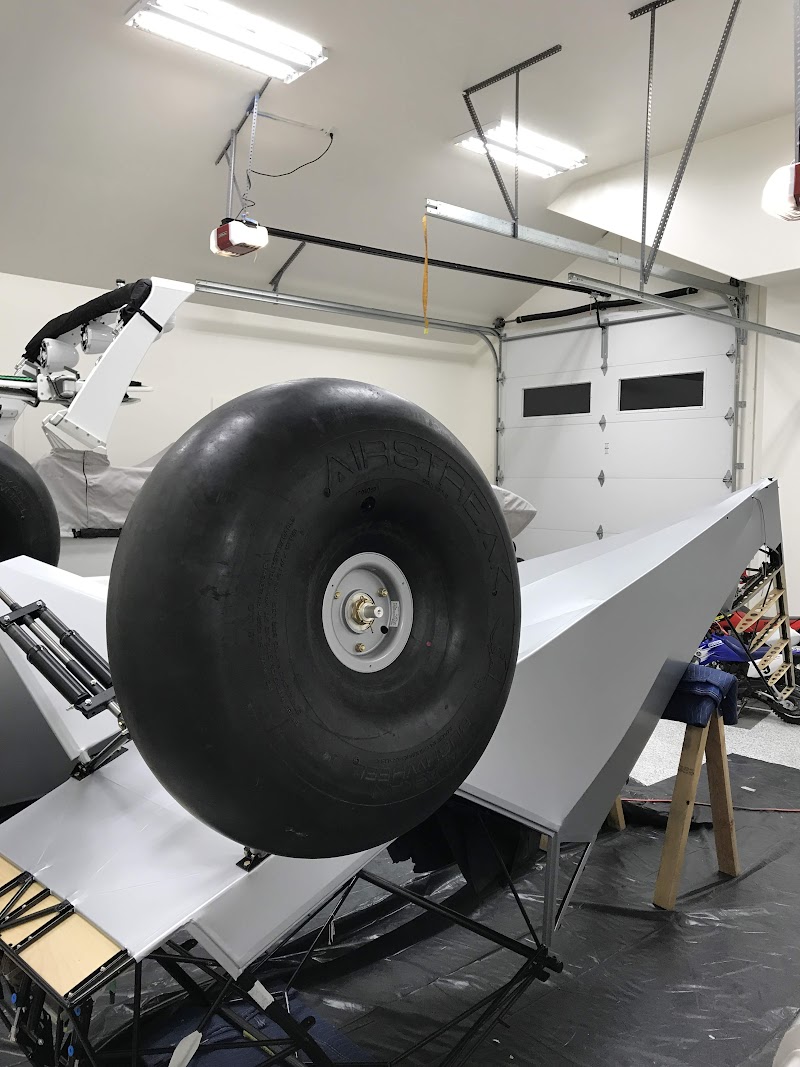
Had a week off work and able to get lots done. I feel like I am so close (to finishing covering) yet so far away. Decided to change gears and do something different this week. Worked on building the landing gear. Was able to get the cabane gear built and covered. I used balsa and hysol to fill the tops and decided to leave the bottom open.
When your building and you can see progress I think it the most enjoyable. Its hard to spend all day and not really see progress. Decided to pack bearings and install tires on the wheels. Then get the gear installed.
Finally started working on covering the tail components. Rudder is defiantly the hardest to cover up to this point. Its very hard to get it looking good in my opinion. Next week I am hoping to get the rest of the tail done. We ordered are T3 and tundra lite. Plan is get the gear on then get both planes turned over. Maybe we will be able to get a photo of them both together at that point!

Also you oratex experts. I have not finished taped the rudder yet. I decided to try a test using finishing tape and whats the trick to installing it without wrinkles. Tried the heat gun to stretch it and then come back and shrink the side before placing down. Still got small wrinkles. I am using 2" finishing tape. Saw a video on youtube. Is this the best method? Any other tricks?

To start, it is looking great. Your rudder fabric is looking better than mine by quite a bit. My foam tips really hindered my heating up the fabric without melting the foam. Anyhow, Finish tapes aren't that difficult especially since you have two people to do it. The part you may find tough is the transition from the fuse to the vertical. That corner is an inside turn rather than like all the other outside corners you have dealt with so far. I used one long finish tape from the turtle deck to the rudder. I secured the two inch tape as usual starting at the turtle deck. At the transition I glued the center of the tape to the entire corner along its center first. Then, with gloves on to protect my fingers from the heat gun I proceeded to heat up about 1-2 inches of the tape as I pushed down on the tape to secure it down. Your fingers need to be in the flow of hot air (hence the gloves). Take the heat away while holding the fabric down with your finger until it cools a bit. It will lift up if you remove the pressure before cool. Turn to the opposite 1-2 inch segment. Heat it up trying not to heat the opposite side that you just attached or it will lift. Work back and forth like that until you have made the entire corner. Not the easiest but doable. I figured that if I messed it up I could just cut out that segment, cut two banana shape tapes and installed those to either side. To cover the seam around this inside radius you would then use a one inch wide tape to cover the seam. One inch tapes are far simpler to get around a corner without wrinkles.
Eddie Forward
Flying
SS7, 912iS, Garmin G3X
Thanks Eddie! Now I need some suggestions on how to cover elevator? Thinking envelope left side, and e envelope right side? Just not sure how you deal with end caps? Any suggestions on how you oratex guys did it?
 Posting Permissions

 Reply With Quote